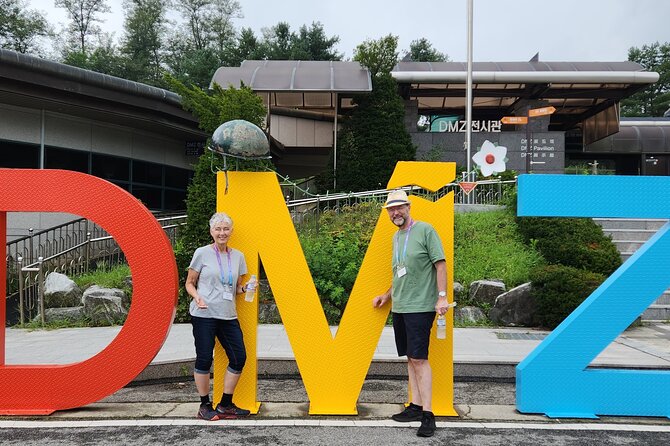
REVIEW · DMZ TOURS
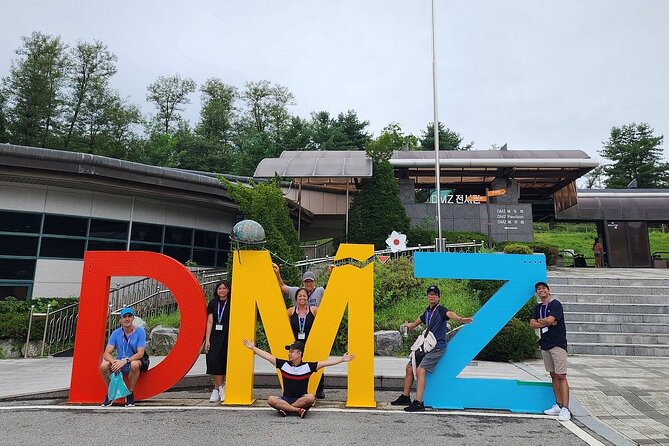
Thrilling Korean DMZ 3rd Tunnel Tour from Seoul + Red Bridge Rush
Book on Viator →Operated by VIP TRAVEL Co.Ltd · Bookable on Viator
History gets real on the Korean border. This full-day DMZ tour from Seoul is built around guided stops, included admissions, and comfortable transport so you can focus on the story. You’ll spend the day seeing the places South Korea uses to explain division without the usual Seoul-scramble.
What I like most is the hotel pickup option from central spots, which saves you from hunting for a meeting point on crowded subway lines. The other big win is the combo of the Third Tunnel and Dora Observatory, where the guide’s explanations help the sites make sense fast and you get time to ask questions. The main consideration: the tunnel portion can be tough, and if you opt into the Red Bridge hike, expect steep, fast-moving climbing that is not ideal for anyone who hates hills.
In This Review
- Key things to know before you go
- A DMZ day trip that’s built for clarity, not chaos
- Price and logistics: how $35 turns into an all-day plan
- Where you meet in Seoul (and why it matters)
- Imjingak sites: the emotional warm-up before the DMZ
- The Third Tunnel of Aggression: the stop that feels hardest
- Dora Observatory: the view is the thrill, but binoculars help
- Tongilchon and the Civilian Control Line: where the day slows briefly
- Optional Peace Gondola and Gamaksan Red Bridge
- Paju Imjingak Peace Gondola (cable car)
- Gamaksan Red Bridge (Gloucester Heroes Bridge)
- Food and shopping stops: fast, functional, and not always what the ad implies
- The guides make the difference: what I’d look for
- Who this DMZ + Third Tunnel tour is best for
- Should you book this tour?
- FAQ
- How long is the DMZ tour from Seoul?
- How much does the tour cost?
- Is hotel pickup included, and where does it happen?
- Do I need a passport for this tour?
- Is lunch included?
- What if DMZ access or tour timing changes?
- Are photos allowed inside the tunnel or from the observatory?
- What is the cancellation/refund window?
Key things to know before you go
- Central meeting points with pickup at Myeongdong, Seoul City Hall, or Hongdae, plus downtown hotel pickup
- Guided DMZ route with admissions included so you aren’t juggling tickets all day
- Third Tunnel is physically demanding (and photo rules inside are strict)
- Dora Observatory is a highlight, but views have limits so plan for binoculars
- Optional extras like the Peace Gondola (cable car) and Gamaksan Red Bridge
- Pace matters: it’s a long day with short stops, and there can be time pressure at some points
A DMZ day trip that’s built for clarity, not chaos
A DMZ tour sounds intense, but the best ones also feel organized. This one is priced like a budget day trip (about $35 per person) and still includes the big-ticket parts: transport, admission to the key sights, and a professional guide in English or Chinese. That mix is what makes it good value for most first-timers, especially if you’re short on days.
One of the underrated benefits is the way the day is structured around stopping points you can actually process. You’re not just staring at signs. You’re walking through memorial spaces, seeing historic sites, and getting explanations that connect them. Guides mentioned in feedback include people like Nancy, Crystal, Judy, Kelly, Henry, Yu Jin, Lina, Ray, and Sunny, and the consistent theme is that the group keeps moving without feeling like a lecture hall.
Still, go in with realistic expectations about access. DMZ-area operations can change based on military issues and events, so the schedule can shift. On rare weather-heavy days, plans can pivot too, with alternate options offered when the main route can’t be carried out.
You can also read our reviews of more tours and experiences in Seoul.

Price and logistics: how $35 turns into an all-day plan
Let’s talk value first. At $35, you’re not paying for a private car and a slow itinerary. You’re paying for a guided route that hits the major DMZ highlights plus a few surrounding landmarks that help you understand context.
Here’s what that value usually means in practice:
- You get included admission to the attractions on the route.
- You get transport that does the work for you, instead of you figuring out buses and transfers.
- You get central drop-off options (Hongdae, Seoul City Hall, or Myeongdong), which helps you roll into evening plans.
It’s also a good fit because group size stays capped at 150 travelers, and the day is designed around keeping everyone in sync. If you’re the type who gets stressed by “stand here, wait there,” you’ll likely appreciate the structure.
Where you meet in Seoul (and why it matters)
This is one of those tours where your morning location can make or break your energy. You have three meeting locations in central Seoul:
- Myeongdong Subway Station (Exit 9)
- Seoul City Hall Subway Station (Exit 6)
- Hongdae Subway Station (Exit 3)
Hotel pickup is also offered, but it’s limited to the downtown area or the main subway station zone. The tour operator notes that meeting times can change depending on your starting point, and tour timing can also change due to DMZ conditions.
My practical advice: choose the start that’s easiest for your hotel on foot or with one short subway ride. If you’re staying outside central areas, the subway connections can eat into the morning calm you’re trying to buy with this tour’s convenience.
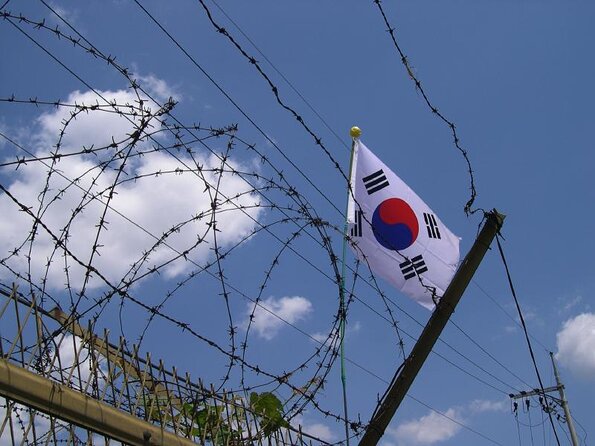
Imjingak sites: the emotional warm-up before the DMZ
The day doesn’t throw you straight into high drama. You first land in Imjingak—a cluster of memorial spaces and symbolic landmarks that explain why the DMZ hits so hard emotionally.
You’ll spend short stretches at places like Imjingak Pyeonghwa-Nuri Park, where the tone shifts to separation and longing. Then you continue toward Imjingak Resort, where your clearance and tickets are handled for entry via the Unification Bridge.
Next comes the Bridge of Freedom. This is one of the spots where history turns into something you can picture: 12,773 prisoners of war crossed the Imjin River in 1953, with the calls of freedom echoing through the story. Even if you only get a brief look, it helps you understand why the DMZ isn’t just geography—it’s also paperwork, prisoners, families, and waiting.
After that, you’ll see more symbolic stops inside Imjingak Park, including the Peace Bell (Pyeonghwauijong), a 21-ton bronze bell meant to represent reunification. These aren’t “cool photo stops” so much as places that put the rest of the day into human context.
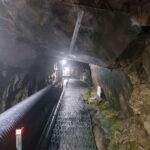
The Third Tunnel of Aggression: the stop that feels hardest
If you remember one part of this day as physical and memorable, it’s usually the Third Tunnel. The route is structured so you reach it after the emotional lead-in, and the tunnel itself becomes the reality-check.
The basic story you’ll hear: the tunnel was uncovered in 1978, and it’s part of North Korea’s covert infiltration plans. It’s located about 52 km from Seoul and about 12 km from Munsan, which is one reason guides emphasize how close this “wall of protection” sits to real daily life in the South.
But here’s the key practical point: the tunnel experience can be strenuous. Based on feedback, you should be ready for a down-and-back trek with a slope, plus tight, low-ceiling conditions inside the tunnel. One traveler described a long walk plus a steep descent and a narrow crawl section around 5 feet high, and that aligns with why some people find the tunnel challenging even when they’re otherwise fine on their feet.
Also note the rules. You can’t count on taking photos inside the tunnel. If you’re the kind of person who wants a selfie or a quick “I was there” moment, plan for your memory to come from what you feel and what your guide explains instead.
My tip: wear supportive shoes with good grip. If you have knee or balance issues, this is the part to think about first. This is also the part where a guided pace matters—if your group moves on a schedule, you don’t want to be the one struggling and slowing everyone down.
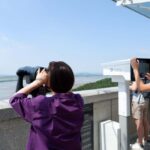
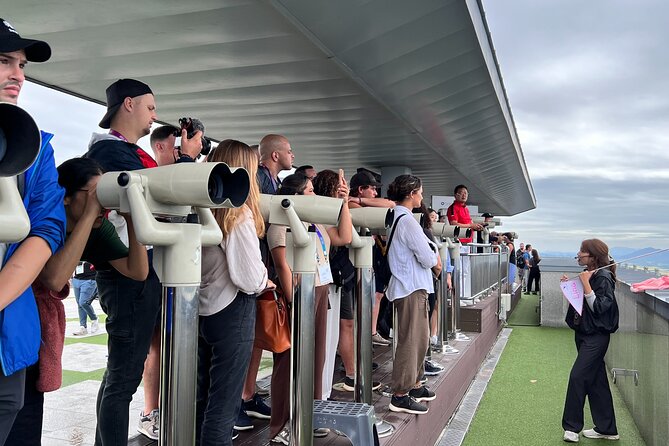
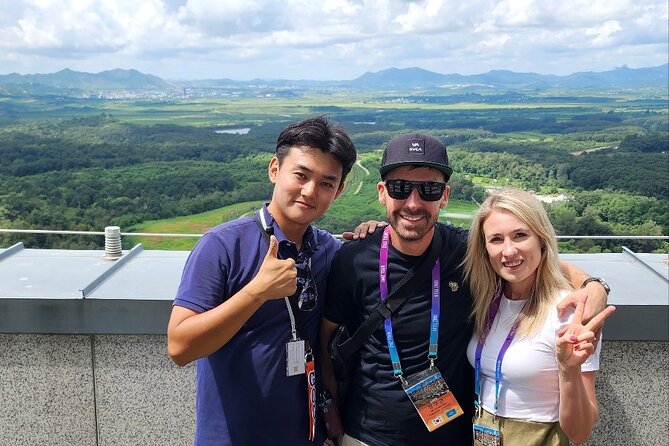
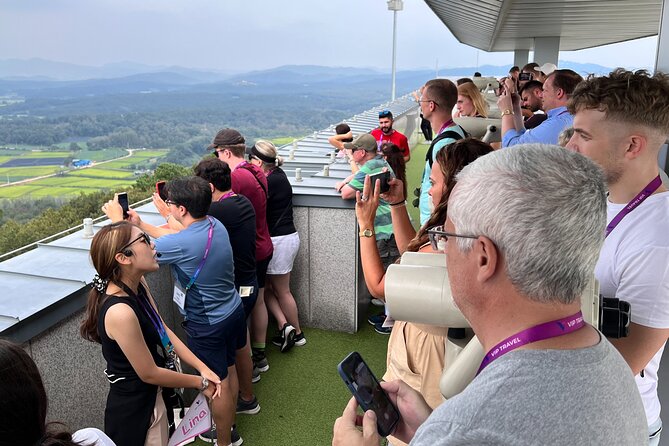
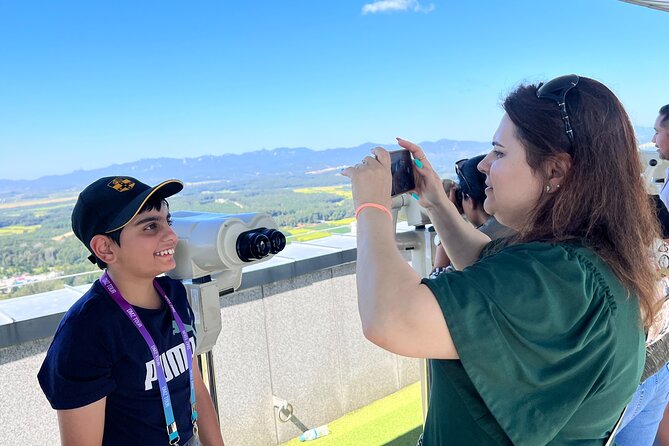
Dora Observatory: the view is the thrill, but binoculars help
After the tunnel, you climb back toward a different kind of intensity: looking outward from Dora Observatory, which sits on Dorasan and is both rebuilt (2018) and based on an older observatory site (established in 1986). This is one of the closest official vantage points from South Korea over North Korea, and it’s why the stop is often described as a highlight.
You’ll peer through viewing areas while your guide connects what you see with the broader system of division. In clear conditions it can feel striking. In less-than-perfect conditions—or simply because distances are far—don’t expect to see crisp details like a movie scene.
That’s where binoculars can matter. One review specifically recommended bringing them because the view to North Korea can still feel far. You also shouldn’t count on photography for the North Korea viewpoint from the observatory area.
This is also the moment where questions pay off. If you’ve been quietly absorbing history all day, ask your guide what the specific lines and areas mean. The best guides turn a far-off view into something you can actually interpret.
Tongilchon and the Civilian Control Line: where the day slows briefly
Near the end of the DMZ portion, the tour may visit Tongilchon Jangdankong Maeul. This is a village area just beyond the Civilian Control Line, and it’s tied to agriculture—specifically the jangdankong bean (a local specialty).
This stop tends to feel calmer. It’s a chance to reset after the tunnel and observatory effort. You may also feel the pace shift from “intense” to “walk around and listen.”
Just keep in mind that your time is still limited. The overall plan runs as a long full day, so you won’t have hours to linger at any one spot.
Optional Peace Gondola and Gamaksan Red Bridge

Not every stop is mandatory, and that flexibility is a quiet strength of the tour.
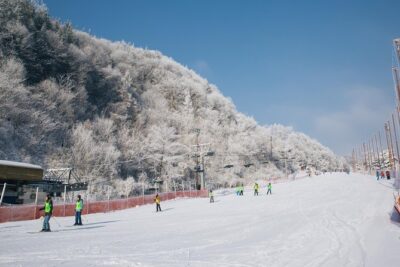
Paju Imjingak Peace Gondola (cable car)
The optional gondola—opened in 2020—crosses above the Imjin River and into the Civilian Control Zone. One of the nice things about an aerial view is that it gives you a different sense of distance and layout than walking did earlier.
If the weather is rough, the gondola can also be a practical way to still get a special viewpoint.
Gamaksan Red Bridge (Gloucester Heroes Bridge)
The other optional thrill is the Gamaksan Red Bridge, also known as the Gloucester Heroes Bridge. It’s a 150-meter suspension bridge built in 2018.
This is where you need to listen to your body. Feedback calls out that the hike up can be steep, and you may have a limited time window to get to the top and back down. If you’re not a confident hiker, this can feel like more effort than the payoff.
If you do go for it, bring shoes suited for uneven surfaces and leave the heavy sightseeing photos for later. Your best souvenir might be the view plus the fact you earned it the hard way.
Food and shopping stops: fast, functional, and not always what the ad implies
There’s no lunch included. That means you should bring a snack strategy. Feedback repeatedly hints that there’s not a true sit-down meal stop. You can often buy food at stops, but the timing can be quick, so pack something you can eat without waiting around.
Shopping is another thing to read carefully. Some people were disappointed by time spent in shop stops, including one comment that the tour was advertised as no shopping but included a longer final-shopping moment at a unification village-style area. I’d treat this as a “possible” factor: this isn’t a strict museum-only day.
If shopping isn’t your thing, you can still enjoy the tour by doing two things:
- Stay alert to the schedule so you don’t waste time at stops you don’t want.
- Focus on your questions and photos where allowed, because those are the moments you’ll actually remember.
The guides make the difference: what I’d look for
A DMZ day can go one of two ways: either you get a smooth narration that helps you see connections, or you get facts dumped while everyone stares out the window. The consistently praised part of this tour is the guide experience.
People specifically credited guides like Judy, Nancy, Crystal, Kelly, and Henry for clear explanations, good communication, and keeping the group on time. Some also mentioned that their guides were funny and upbeat, and that they explained what to expect at each stop so you weren’t guessing.
Here’s what that means for you: if you ask questions, you’re more likely to get meaningful answers instead of a script readout. This is a tour where curiosity is rewarded.
Also, some travelers mentioned the guide helped them with photos and even taught bits of Korean along the way. Those small extras can turn a strict border tour into a day that feels human, not just controlled.
Who this DMZ + Third Tunnel tour is best for
This is a strong choice if:
- You’re visiting Seoul and want a single full day that covers the biggest DMZ symbols and sites.
- You want a guide to connect history and meaning instead of piecing it together yourself.
- You’re okay with a long day and short stops, not a slow travel pace.
It’s less ideal if:
- You want lots of free time for independent exploring at each stop.
- You dislike physical efforts. The tunnel can be tough, and the Red Bridge hike can be steep with time pressure.
- You’re very sensitive about photo restrictions, since there are clear limits inside the tunnel and at viewpoints.
If you’re traveling with kids, the tour may work for older, reasonably active teens and families who can manage long standing and walking. If your group includes someone who struggles with slopes or tight spaces, I’d prioritize the Red Bridge decision carefully and consider whether the tunnel is safe and comfortable for them.
Should you book this tour?
I’d book it if you want the core DMZ experience from Seoul in one organized day, with the most intense stops—Third Tunnel and Dora Observatory—covered by a guide. At around $35, the value is strong as long as you’re comfortable with the day’s pace.
Skip or rethink it if physical strain is a dealbreaker for your group, or if you’re hoping for a no-hassle museum tour with zero shopping time and lots of lingering. This isn’t that.
If you book, do two things and you’ll feel more in control: wear proper shoes, and bring snacks so you’re not stuck waiting for food. Then bring your questions—this is exactly the kind of day where a good guide turns distance into understanding.
FAQ
How long is the DMZ tour from Seoul?
It’s about 7 hours 30 minutes (approx.).
How much does the tour cost?
The price is $35.00 per person.
Is hotel pickup included, and where does it happen?
Yes, hotel pickup is available only in the downtown area or at main subway stations. The tour also offers meeting points at Myeongdong (Exit 9), Seoul City Hall (Exit 6), and Hongdae (Exit 3).
Do I need a passport for this tour?
Yes. A passport is needed on the tour day. Military ID Cards and locally issued ARC cards are also accepted.
Is lunch included?
No, lunch is not included.
What if DMZ access or tour timing changes?
The tour time can be changed depending on military issues or events within the DMZ. On some days, the schedule may shift due to conditions.
Are photos allowed inside the tunnel or from the observatory?
You should expect that you cannot take photos inside the DMZ tunnel, and you also may not be able to photograph the North Korea view from the observatory.
What is the cancellation/refund window?
You can cancel for a full refund if you cancel at least 24 hours in advance of the experience start time.
![Andong Hahoe Village [UNESCO site] Premium Private Tour from Seoul - Stop 1: Andong Hahoe Folk Village walk through traditional homes](https://1.visitseoulkorea.com/wp-content/uploads/andong-hahoe-village-unesco-site-premium-private-tour-from-seoul-400x267.jpg)